Although I try and plan a week's worth of meals ahead of time, things don't always work out that way. Last week was one of those times, and I had nothing to make for dinner on Thursday. Rather than order out, I scrounged around and found the ingredients to throw together a pretty good breakfast burrito. Here's what ya do:
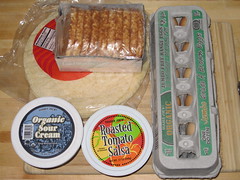
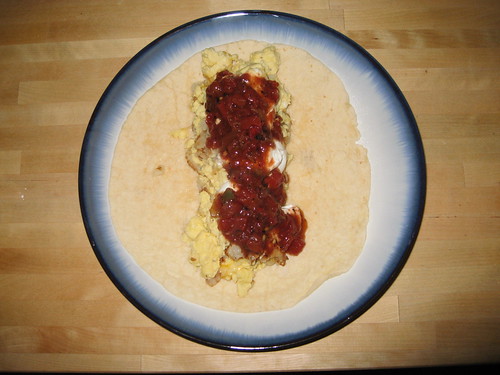
It's always a good idea to get all the ingredients out first. For my burrito, I decided to use eggs, hash browns, cheese, sour cream, and salsa, all wrapped in a flour tortilla. If you want to add meat, it's a good idea to cook it before you add it to the egg mixture.
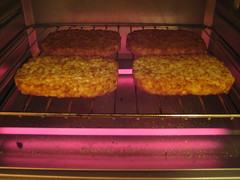
The first step is to brown the hash browns. You could do this in a pan, but I found it really easy to brown them in the toaster oven. These are frozen hash brown patties that Zeph picked out at TJ's one day, so they were just hanging around in the freezer.
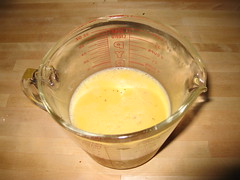
While the hash browns are crisping, you can prepare your eggs. I used 6 eggs to make 3 burritos, which comes out to 2 eggs per burrito. This was a good amount, and made burritos that were easily wrapped. To make the eggs fluffier, add a little water or milk. I just found out last night that Jacques Pepin recommends adding sour cream, so I might try that in the future.
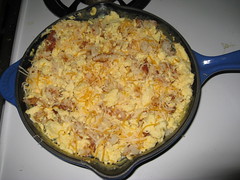
Cook the eggs until slightly runny. You want to turn off the pan before the eggs are completely cooked, and then let them finish cooking using the residual heat in the pan. If you wait until the eggs looked perfectly cooked to turn them off, then they will end up overcooked. This is bad. Once the eggs are cooked, add the hash browns (I mashed mine with a spoon as I mixed them in) and some grated cheese. There should be enough heat left in the eggs and hash browns to thoroughly melt the cheese.
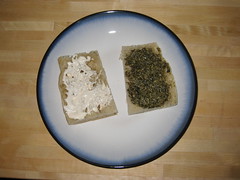
To assemble the burrito, spoon some of the egg mixture onto a tortilla and add whatever toppings you desire. I used sour cream and salsa, and I would have added some avocado if I had had any.
Fold, and eat! I love cooking on nights like this because half of the fun is poking around in the cupboard and finding out what the hell will go good together. Don't be afraid to try new combinations!
After the carnage of Monday night's dinner, it was time to tone it down a bit with an easy vegetarian meal. Here are the steps to making wonderful portobello mushroom and goat cheese sandwiches.
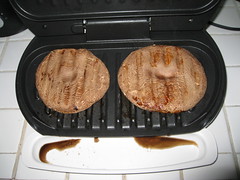
Grill some portobello mushrooms until grill marks appear. Don't wait for them to be super black, because you need them to stay on the grill a little longer after the initial grilling period.
Yes, that is a George Foreman grill. It is one of the best pieces of kitchen equipment I own. One day I hope to own the model with adjustable feet so that it can be a slanted grill or a flat grill. There's not much fat to be drained off in the mushrooms, so all that happens is some water loss.
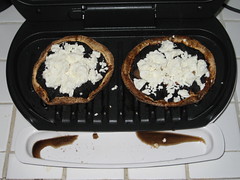
After the mushrooms are mostly grilled, place some goat cheese on top and let the cheese melt. I prefer putting the cheese on the side with the gills because it sits in the natural concave shell of the mushroom.
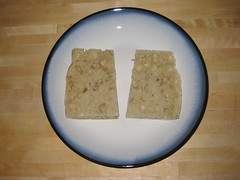
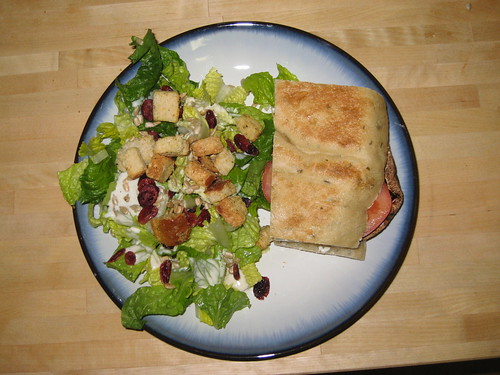
While the cheese is melting, get out whatever kind of bread you want the sandwich to be on. Sometimes I use whole-wheat buns, but I happened to have some focaccia in the house, so I used that. If using a flat bread, cut the bread in half length-wise.
After you have sliced the bread, spread on whatever condiments you wish. I spread half of my bread with pesto and the other half with a little bit of mayonnaise.
Once the cheese is melted, assemble the sandwich, and eat! Extra produce can be added, if it is desired. I added some slices of tomato to my sandwich for extra moistness. Mmmmmmmmmmm
I posted my first video to YouTube yesterday. It's a short clip of me deboning the chicken that Zeph took with his canon digital camera. Check it out...
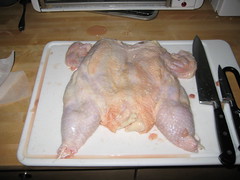
Last Friday when San Francisco was experiencing a huge storm and Father Privett closed campus, I sat on my couch and watched hours of cooking shows on PBS. The segment that intrigued me most was Jacques Pepin deboning a raw chicken and then stuffing it. "I can do that!" I thought to myself. So I set out to do it.
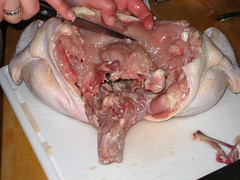
You start with a whole chicken, and make a slice down its back. Cut into the front of the breast to remove the wishbone, and then start peeling the meat down the front of the carcass. You can use a knife here and there, but mostly the meat will just come away by pulling with brute force.
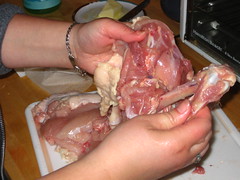
After you have the front and back of the main carcass removed, you need to take the bones out of the wings and legs. To do this, work the meat away from the bone using a knife and your hands, slowly turning the legs and wings inside out in the process.
After enough slicing the leg bones will be free. Look at how the joints still work!
Eventually, after all the work, the chicken will be free of bones. It still looks like a chicken, just a very flat chicken.
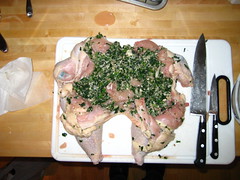
Now that the chicken is deboned, you can start stuffing the bird. My stuffing consisted of one package of chopped frozen spinach (thawed and squeezed dry), one carton of mushrooms (tops only, chopped fine), two cloves of garlic and one onion (both of which were also chopped fine), and some goat cheese. Fill all of the empty cavities in the legs and wings with spinachy goodness.
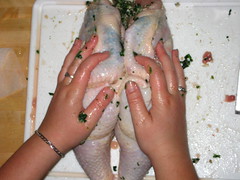
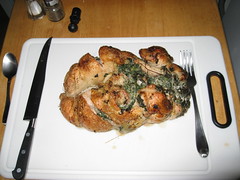
Reform the chicken into a chicken shape, taking care to wrap all of the stuffing so it doesn't spill out.
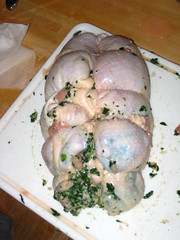
Then tie the chicken with kitchen twine or some other kind of oven-safe thread material (white embroidery thread worked well for me).
Pop it in a pan and roast it in a 350 degree oven until cooked through. Mine took about an hour and a half.
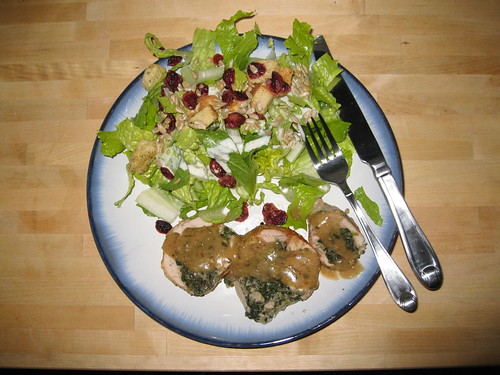
Slice
Eat!
See my flickr page for more photos, as well as for how to make the gravy.